Create a Help file with Sandcastle in Visual Studio
The FORCE studio
使用Sandcastle工具在Visual Studio環境產生Help文件
作者:JB
Source Website : http://sandcastle.codeplex.com/
Sandcastle is a tool used for integrating the XML comments in Visaul Studio project.
It can help creating a Help file such as HTML Helper format. Though installing Sandcastle is not an easy task, using it is quite simple.
It can help creating a Help file such as HTML Helper format. Though installing Sandcastle is not an easy task, using it is quite simple.
1 Download
※.NET Framework 3.5 SP1 or above version
※Sandcastle
※Sandcastle Help File Builder
※ HTML Help Workshop(For HtmlHelp 1.x format)
※ HTML Help 2.x (For HtmlHelp 2.x format) : However it cannot be downloaded individually. You must install Visual Studio 2005 SDK or Visual Studio 2008 SDK。
※.NET Framework 3.5 SP1 or above version
※Sandcastle
※Sandcastle Help File Builder
※ HTML Help Workshop(For HtmlHelp 1.x format)
※ HTML Help 2.x (For HtmlHelp 2.x format) : However it cannot be downloaded individually. You must install Visual Studio 2005 SDK or Visual Studio 2008 SDK。
2 Install
Screenshot_01 shows what we download.
First we install 「Sandcastle.msi」 and then unzip SHFBGuidedInstallation_1934.zip (Screenshot_02, the file name depends on version ).
Click SandcastleInstaller.exe to install it. The install process will check the necessary component step by step. Sorry for skipping the install details here.
Screenshot_01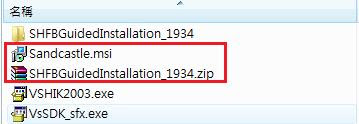
Screenshot_02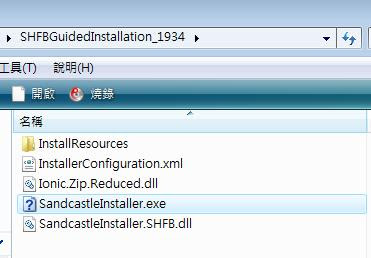
Screenshot_03 (Installing)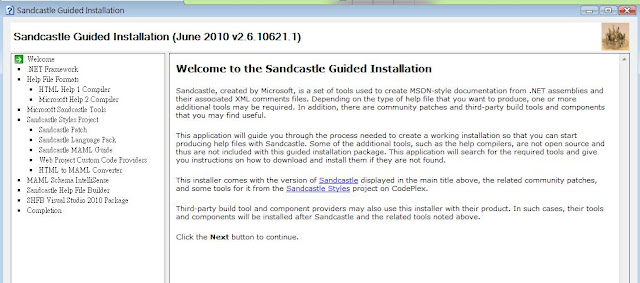
Screenshot_01 shows what we download.
First we install 「Sandcastle.msi」 and then unzip SHFBGuidedInstallation_1934.zip (Screenshot_02, the file name depends on version ).
Click SandcastleInstaller.exe to install it. The install process will check the necessary component step by step. Sorry for skipping the install details here.
Screenshot_01

Screenshot_02

Screenshot_03 (Installing)

3 Create HTML Helper
3.1 Open 【Sandcastle Help File Builder GUI】.
Click 「New Project」

Click 「New Project」

3.2 The 「New Project」 means the new project of Sandcastle, not the project in our Visaul Studio. Choose your destination folder and type the project name.
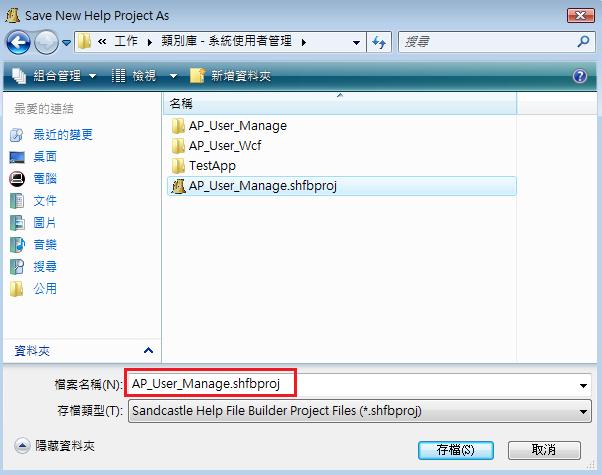

3.3 Since we create a new Sandcastle project, 【Project Explorer】 appears on the right side of the tool.
Right click on 【Documentation Source…】 to add a existed .NET project.
Of course, this time we choose our Visual Studio project. (*.sin)。
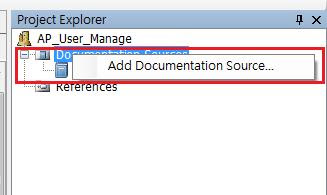
Right click on 【Documentation Source…】 to add a existed .NET project.
Of course, this time we choose our Visual Studio project. (*.sin)。

3.4 Next, lots of options showed up in Sandcastle.
I listed some common options in step 3.5.
After we finished setting up the options, just click 「Build the help file」 and the Help file would be created. Simple and excellent!
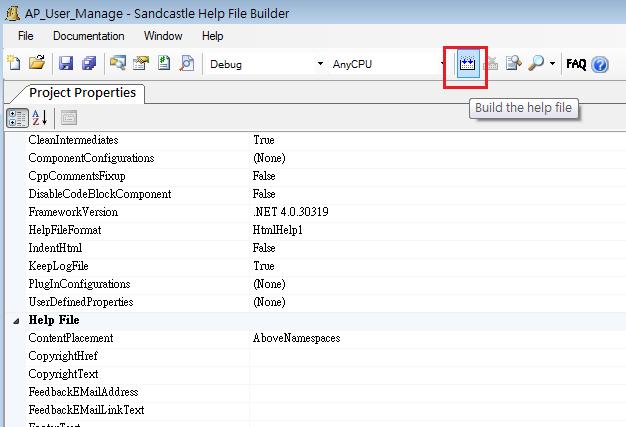
I listed some common options in step 3.5.
After we finished setting up the options, just click 「Build the help file」 and the Help file would be created. Simple and excellent!

3.5 Common options~
※ Build → Framework Version:(skip)
※ Build → HelpFileFormat:Choose Help file format.
※ Help File → HelpTitle: The title text in Help file.
※ Help File → HtmlHelpName:The Help file name.
※ Paths → OutputPath:The Help file destination path.
※ Show Missing Tags → ShowMissingNamespaces:False
※ Build → Framework Version:(skip)
※ Build → HelpFileFormat:Choose Help file format.
※ Help File → HelpTitle: The title text in Help file.
※ Help File → HtmlHelpName:The Help file name.
※ Paths → OutputPath:The Help file destination path.
※ Show Missing Tags → ShowMissingNamespaces:False


